Pages

Tuesday, February 4, 2020

Encourage Yourself Out of Your Comfort Zone!

I have always wanted to be able to draw...just like I always wanted to be able to paint...no one, but myself, told me I couldn't.

The best advice I have, regarding what your limitations are, is ignore everything you are afraid of and TRY!  The joy we feel when we exceed at something is just as strong as the defeat we feel when we
feel like we've failed.

There are countless times that I draw something, or paint something, or attempt something that I think is difficult, and I look at it and think "WOW, I did that!!" And countless other times that I try again and think "Crap, that looks awful!"  Both ways are always a surprise.

When I think it looks great I post it on social media.  When it looks like crap I post it on social media and critique myself - only to find that I receive AMAZING support from loved ones, and very helpful, constructive critiscm from loved ones and others who are genuinely wanting to be helpful.

My point is that NO MATTER WHAT I am able to grow from what others have offered.  (If it's not constructive, helpful or positive, then I don't listen - takes time to develop that skill, but eventually it comes to you through confidence).

I have been doing multimedia for years.  Recently I have started delving in the realm of personalization through drawing - specifically, face drawings.

If you are interested in doing this yourself, please watch the tutorials offered on YouTube by Dina Wakley!  She is an amazing inspiration and teacher!!  Thru one, 6 minute video, I was able to draw my first face!

This was my VERY first attempt at a face, and I am so pleased with how it turned out that I don't want to add any color or paint.

I have drawn several faces and painted a few, that I posted on Facebook, and have received positive feedback from loved ones and kind strangers, alike.

I have taken the criticism and have used it to improve what I am doing, and I have really enjoyed the process of it all!!

I have also found, that the hardest part of venturing out with paint, is mixing proper flesh tones.  I am also afraid of making skin tone that is not of the normal, human tone.

All of this is COMPLETELY new to me and will have to be learned as I continue with this process.  I have no doubt that there are many bridges ahead but I wanted to share my first bridge along the way.

I have enjoyed this journey and have appreciated the teachers along the way, Dina Wakley, Amy Joy, and several other anonymous youtubers that I continue to watch and enjoy.

I hope you have found some inspiration from what I've shared.  I encourage you to find your joy in the art world - I continue to find joy in new things I create and avenues that I have traveled. 


Monday, January 20, 2020

Gelatos - Step By Step!

Creativity is something that is a constant thought for me - whether it is paper crafting, tumblers, glitter, or a new avenue that appears in my browser that I venture down thru curiosity.

Another constant for me is COLOR. Everything I do, I do in color - post its, paint on the walls, accents throughout the house - EVERYTHING.

I feel way more comfortable when I am surrounded by color.  It allows me to see things that others don't - sometimes, if you simply change the hue of the filter a new world is opened to you!

Gelatos is a new avenue for me.  They have allowed me to express color, in small amounts, in very vibrant ways!

I purchased a Fabre-Castell Gelatos kit at Michael's on clearance - from $29.97 marked down to $9.97.  I was tickled to find this as I rarely find a great deal in their clearance section that is actually worth picking up - but I keep trying.

This kit came with 10 Gelatos, several different remnants with different textures to try, a brush, a small container of Gesso, and a technique book to guide you in the different ways that Gelatos work.

The booklet suggested several different ways you can use Gelatos, including wet, dry, stamping techniques, textural variations, and making mists.

I read thru the booklet and it was very informative, and easy to follow.  The only thing it did not explain was the fun and delight that using them for the first time would be.

I used the white, smooth paper remnant that came with the kit for my first try.  I first Gessoed it with the Gesso that is included in the package and allowed it to dry.

I then added various colors of Gelatos, in small increments, blending it with baby wipes.  I noticed that the wipes really diluted the color.  When I wanted more color in areas I rubbed it in with my fingers, whetted slightly from the baby wipe.

 I also added a bit of tissue wrap from Tim Holtz's idea-ology Melange collection.  I used glitter Modge Podge to secure it to the remnant of paper.

I stamped the "Giggle" in watering can Archival Ink.  Then stamped it again, slightly offset, in Memento, tuxedo black ink to give it a ghosted look.   The stars were stamped in Watering Can Adirondack ink and then stamped again in another spot (two-step stamping), to lighten the color.

Dylusions spray ink was sprayed over a circle stencil for the polka dot look, and, additionally, around the edges of the remnant.

After the Dylusions spray, alcohol was spritzed over the area for additional texture.

An extra fine Sharpee marker was added to concrete the edges of certain objects/designs to bring attention to them.

I added the remnant to a previously designed art journal page.  It is really striking how wonderfully the 2 come together - and a testament to how similar my style is :).  It is amazing to see how they all work together.


If you are hesitant on trying something new, don't be.  Express yourselves in every and any area that you enjoy!!  Don't be afraid to try something completely new.  The journey and lessons learned are WELL worth exploring!

Thanks again for stopping by to see what I am up to and doing.

Your support is so very much appreciated!

See what others don't and express yourself as much as possible!!


Friday, January 17, 2020

Tumbler LOVE


There are so man avenues that we can use to express ourselves in Art.

Most of the work I do, and most that I don't share for no reason other than I am busy and become forgetful, involves glitter.

One of my favorite works is a nice, burgundy tumbler with a bit of gold.

I have been dabbling in tumblers and cannot wait to share all of the colorful projects that I am working on - glitter or not :)

This tumbler is a 20 oz skinny tumbler that I intend to add a monogram for my daughter.

There has been a lot of talk of custom tumblers erywere you look - but making them is really a work of art.

For this tumbler I applied a VERY thin layer of epoxy (not recommended without proper personal protective equipment [PPE]), and then added the glitter until the "wet" appearance is no longer visible.

The epoxy method is the best way to apply glitter as the least amount of glitter is needed.

The glitters used for this project are Boudreaux and (the BEAUTIFUL) Pandora, from PDB Blanks.

I will show the finished cup/tumbler on my Instagram when it is completed!!  Please subscribe @everysparemoment if interested to see it!!

Saturday, January 26, 2019

I really need to stay on top of my blog...I feel very neglectful of this blog (repeatedly)...but boy have I been busy...these are the activities that I am currently involved in:

Planning
Tumbler Making
Scrapbooking
Painting
Homemade crafts and gifts for all occasions
Vinyl Creations

and on and on I could go.

I am very active in all crafting and tumbler related items and am loving every moment of creation!!

I am currently working on this cup...


Tuesday, July 31, 2018

Vinyl is SUPER ADDICTIVE


I have fallen down the rabbit hole of vinyl and my Silhouette...I have made several projects and can't wait to make more...

I have done several projects.  I have not been posting them as I have been trying to practice up and get great at using vinyl on all kinds of projects.

So far I have made personalized egg cartons, porch signs, epoxied stainless steel tumblers...the list goes on and on.  There is always something going on in this crazy life and I am trying to keep up the best that I can - between trying to exercise, lose weight and get back into running, making stainless steel tumblers, flow painting, porch signs, etc...there is always something I am trying.

I keep trying to keep my blog up-to-date, but see to fail at most corners.

I will keep trying...but just like the title, #everysparemoment.


Thursday, May 10, 2018

Where I am now...

Alright, as promised, an updated on where I am and how I'm doing....

I am still dealing with all of the laundry that a family of 5 generates.  I (sometimes) can't seem to get the load in the washer from stinking to HIGH Heaven....but I continue to try, because I feel as though I am endlessly trying to find that special sock or pair of pants...

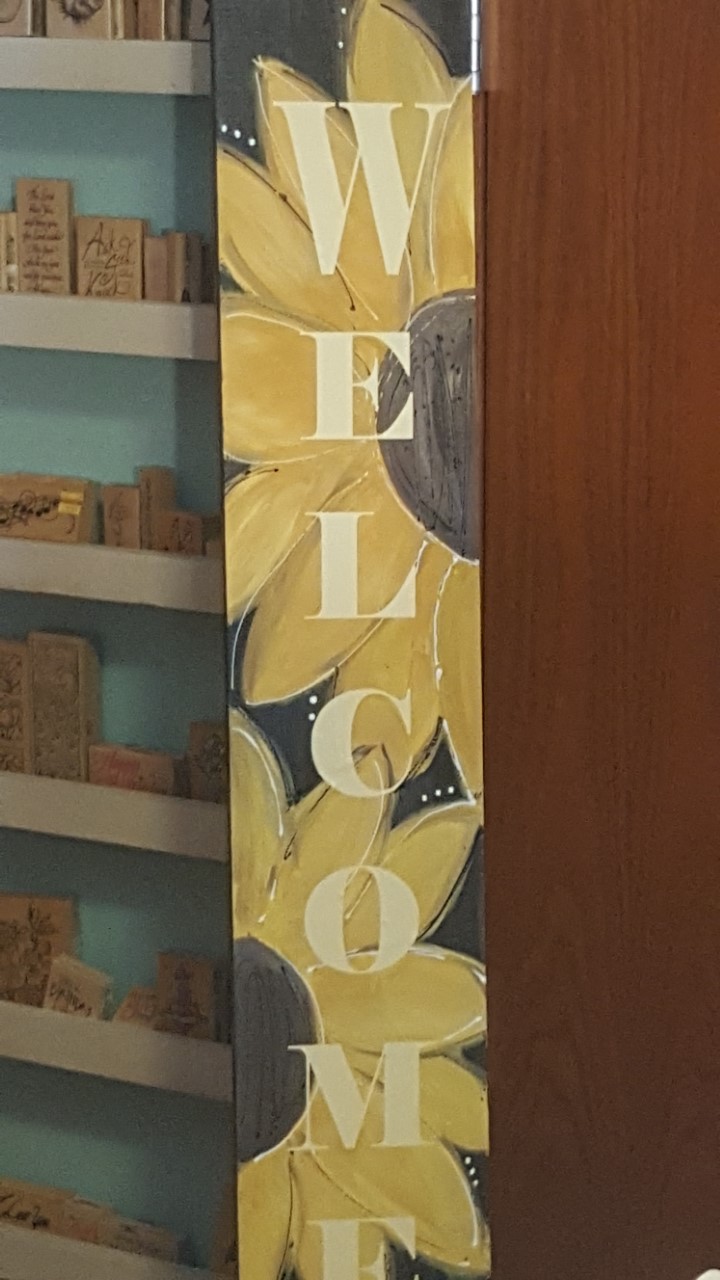
I have taken some time from everything to make my VERY FIRST VINYL sign....I have stained, painted and applied vinyl to this sign and am very proud...I feel that since I have made my first one for my Mom then this venture will be successful - we will wait and see ;)  For now, I am just taking it all in, continuing to try to make strides forward with decluttering, organizing and cleaning.

My Mom's sign:

 (I'm so, so proud!!)

If you want to share your own struggle with me I would be grateful.  I want to hear from others who struggle, like me...or who have struggled and are succeeding...

Thanks for stopping and reading this far!!


Friday, May 4, 2018

Where have I been, and where am I going?

I struggle EVERY day with time and priorities.  I struggle to clean my home, stay on top of my families hectic schedule and keeping the love alive with my husband.

All of these struggles get bigger when not dealt with...and honestly, I have SUCKED with keeping up.

And on top of ALL of this, I have my own desires and wants...I want to get back into running, I want to continue to do art - vinyl, furniture, scrapbooking, cards.  I want to blog (for no other reason bu myself)...but there are so many things that I want in this life and I have felt limited for sooooo long....

This will be an attempt to revive this blog and let others know that the daily struggle is so real.  I know that I am not alone, just alone in my thoughts of how well I am doing...

Honestly, I am my worst critic.  And, my loving husbands opinion matters too...he is not as bad as anyone is thinking at this point, but all of the above has been difficult on our relationship....

So, what have I been doing?

I have been paper planning, because that works for me...there are so many methods of keeping ourselves accountable...paper planning, to do lists, phone reminders...all of which should be helping us get thru the day to day...but what about finding the motivation to get up and do what we need to do?

I have gone to YouTube to find motivation...boy, there are videos out there for EVERYTHING....

My favorite motivators (by far) are Do It On a Dime


http://www.doitonadimeblog.com/blog/

and Clutterbug


https://www.youtube.com/user/OrganizedClutterbug

From these ladies I have learned so many things that I want to share with everyone...I HIGHLY encourage you to take the clutterbug quiz and figure out what type of "bug" you are...Cas is very insiteful and can help a lot....

I know that this post has been long...especially considering that I haven't posted in quite a while....but if you stuck with me this far I know that you either 1) know what I am going thru, 2) have been where I am at, or 3) are truly interested in me and my story....

If it is # 3 I am grateful to know that you care.

I will gather my thoughts and continue with my struggle/story soon.

Thanks for staying with me....


Monday, January 18, 2016

Planning is DEFINITELY an addiction!!


Hello All!!

I have been doing so many different things this year that I wanted to start sharing what I'm doing!!

If you have not heard of Christy Tomlinson via She Art, Scarlet Lime, or The Planner Society then you should really check her out!!  She is a wonderful, hardworking and inspiring women who uses multimedia and is very passionate about art and sharing her love of it.

Cori Spieker is another new inspiration of mine.  She is #TheResetGirl who has so much inspiration to women who are looking to lead a goal oriented life.

As I have been involved in many projects over the last year I have made time (#everysparemoment) any where that I could to be as creative as possible.  Art and creativity is definitely an outlet for me and I enjoy it so much.

Last weekend I had the wonderful opportunity to go to a "planner" meet up where many of the local planner ladies got together and enjoyed sharing knowledge with each other, as well as, met other women in the community with the same passion for planning that they have!!

This activity was hosted by local big names, Ally Elizabeth from @filoally and Rachel Puckett from @penpalhappyness.  I was asked to design the tables center pieces and also to bring a game.  Some of the center pieces are posted in the following pictures:


These are example of October, August and September.  I make the paper clips using supplies from Michaels or Walmart.  In addition to these center pieces I also brought a poem for the event.  I received inspiration for this game from my neices bridal shower...

This is a rather peculiar game
As it really doesn't have a name
It's simple to play as a game should be
Get ready to count and then you'll see
In the end whoever scores the most
will receive a prize from the host
Now since you are all so well organized with plans that need to be seen
Give yourself 5 if you're a washi and sticker QUEEN
You may add 3 for clips that peek out
And page flags will give you 2 more to shout
Score yourself 5 if your planner is red
Add 6 more if you've finished this weeks spread
Now before you think you're going to win
Take away 2 for the bag you brought in
Give yourself 6 if your planner is white
No? Then add 1 if the color is bright
Add 5 more if you have more than 1
and take away 3 for a zipper, just for fun
Now count your dividers for each you get 2
And take away 1 for each that is blue
Give yourself 5 if your ringed binder is gold
And why not take 10 if you are at least 20 years old
10 more points if it's a Midori you bear
But take away 5 if your planner is pear
9 points to the driver, yes, that's the deal
Subtract 12 if you weren't the one behind the wheel
this is the end, the points are no more
So who is the lucky lady with the highest score.

This poem was so fun and I received a LOT of positive feedback for all of the games that I made and played with the gals.

I hope you see my passion and, at the very least, check out the planner community on pinterest, Etsy, YouTube, and Facebook.  There are many communities that are very supportive, encouraging and welcoming.  

By becoming involved in this outlet I have learned that I can be creative in EVERY aspect of my life and it has been so much fun!!


Friday, December 18, 2015

It is UNBELIEVABLE how time flies and gets away from you! !

I've said this before, and have every intention of sticking with it, but I have every intention of showing my projects!!

I have been wrapped up in my newest passion, planning with my Midori Traveler's Notebook, and have found so many ways to share my art that I know this is a great venue for me!!  I love to explore different ways to record my life-especially with my children as they grow so fast!

I will post a quick overview of my layout...what I have found to work for me and what I have found that I don't like.  I will post a video of my setup with a link to my YouTube channel...I hope you are as in love with this new avenue as I am!!


Tuesday, January 21, 2014

Bring on 2014!!


I cannot believe how tough 2013 was!!  It was so jam packed that some days I didn't know which way was up...with 2014 my main goal is to get a grip on the kids schedules and make sure I get some time in for myself.  So, as part of the whole goal setting...which I did last year with the goal of blogging my creations more (which didn't work that great, but I'm going to do it again) I have set the goal of taking the 12 tags of 2014 challenge that Tim Holtz hosts, among other things :).  His original inspiration can be seen HERE


I am so please with how well my tag turned out.  I love glitz and glitter and this is a perfect example of my style.


I used Ranger Distress ink in peeled paint, vintage photo, and gathered twigs in a simple sponge technique then did Tim's infamous spritz and flick with water to create a little texture.  At this point I heat set the tag.

I then added the Flourish using Jet Black Ranger Archival Ink.  The creativity motto, from Tim's Holtz visual artistry set, Regal Flourishes, which was stamped in Coffee Ranger Archival Ink.
I also stamped Live & Life using Tim Holtz's set Life's Possibilities, which I attached using foam tape to help them stand out a little from the original image.

I added the keyhole, gem, and antique keys, being sure to position them with glossy accents.  I also filled in the keyhole with the glossy accents as well and added a nice burgundy colored organdy ribbon.

For the final touch I added random touches of gold Stickles to the Flourish stamp as well, just to add that extra little sparkle...too much?


Stay Inspired!!


Roseanne


all products used:  Distress Ink:  peeled paint, vintage photo, gathered twigs; Ranger Ink:  coffee, jet black;  stamps:  Tim Holtz Visual Artistry Clear Stamps Life's Possibilities, Tim Holtz Flourish, Tim Holtz Regal Flourishes; Gold Stickles, Glossy Accents, Tim Holtz idea-ology Key Holes, Beadlanding Found Objects (keys), Making Memories Gem - Jill Schwartz Collection, generic organdy ribbon.

Saturday, May 18, 2013

Tim Holtz Distress inks with Glitter Happy Birthday Card


Birthday greetings are always so AWESOME especially when there is glitter involved!! 

A physician that I work with is celebrating his 39th birthday, again...Honestly I don't know how old he is, but it is never to late to get a fun card!!!  I gave him this tag that I have been carrying around for no particular reason, but to find a reason to give it away. 

I made this tag so long ago, and I was so unsure of the colors that I wasn't sure what I was going to do with it!!  I actually was waiting until my friends daughter turned 11 this August to give it away, but then I thought why not give it to him!!


 I used Tim Holtz distress inks in concord grape and raspberry in a simple circular application.  I then water distressed the color to give it a nice texture. I stamped the guitar and stars using a CTMH image, in stazon black.  The Happy Birthday message is from a wood mounted stamp from Hero Arts that I purchased at Michaels or Hobby Lobby.  I like how large the message is - sometimes the larger sentiments are very useful for covering blank space.  I applied the glitter using a glue pen.  The last thing I did to accent the guitar was trace a small portion of the bottom with silver ink to make it stand out.

This tag  was so easy and fun!!  You never know what your going to do with something once its made - like I said, I originally thought of this for a young girl.  Who knew it would give a smile to a (ahem, elderly) professional.  :)

Any and all comments are welcome and encouraged.

Thanks for stopping and happy stamping!!

Roseanne

Saturday, April 6, 2013

CAS214 Splitcoast Stampers Technique Challenge


I have been perusing the SplitcoastStampers web site quite frequently lately...I am really looking forward to the Dog Days of Summer Mini Virtual Stamp Night on 5/3 and the Main Virtual Stamp Night 6/7 & 6/8.  (As it happens I am a hostess for this event on the 8th at 8 p.m.- and I'm not sure if I should be announcing that...but hey, I'M EXCITED!!)

Back to my original thought, the website posts challenges, which I always like to view to gain inspiration and I came across CAS214 - the clean and simple challenge using the chalkboard technique.  I created this card for the challenge and am very satisfied with how well it turned out.

 I started with the black card stock and added a rub-on  (I LOVE rub-ons)... and used the pink polka dot paper from My Mind's Eye - Happy Day 6X6 pad.  The opposite side of the polka dots is the teal gingham.  So only one sheet of designer paper was use - very convenient.  I added the magenta bow and gem once all was put together...the measurement of the black piece is 2 7/8 X 2 3/8 inch.  The teal pieces are 1 x 2 7/8 and 1 x 2 3/8, and the pink polka dot is 1 x 1.  Be sure to measure twice and cut once...but make the measurements as you need.  I then used a a corner rounder on 2 of the 4 corners on each of the pieces.  The background is a basic white cardstock.


I wanted to also show the back of the card as well.  I think its necessary to give a shout out to those who do hand made crafts!!  This personalized stamp was made by someone I found on Etsy.com.  I can't remember who made it, and yes, it was from China, however, I think it was so nicely done that I wanted to show it!!

The things that I would like for you to take away from this post today is the challenge done and the adventurous nature and beauty of buying from other crafters that need and love your business. 

God Bless and keep stamping!

Thanks for looking and any and all comments are welcome!

Monday, April 1, 2013

Simon Says Monthly Card Kit

I have recently subscribed to the monthly card kits featuring exclusives from Simon Says...I have been looking forward to receiving my monthly kit and this month was no exception.

With this months kit I produced this card:

Although it is a sympathy card..the colors coordinated really well..the yellow gingham ribbon was purchased from Michaels and the kraft cardstock is from SU!  The Simon Says Flower Friends set was included in the kit...and the 'with sympathy' sentiment was on it.  I distressed the edges of the card because I typically do that, but I'm not sure it was really necessary.  I didn't want to use any bright colors because of the nature of the card, however, I think the yellow ribbon does the trick!

Thanks for looking!  Comments are always encouraged!

Saturday, March 30, 2013

Another Tip Learned!


Back again today with another card made using the tips and techniques learned from the Pattern Play OnLineCardClasses.com, taught by Jennifer McGuire and Kristina Werner.

The focus today is using hard to use patterns...patterns that are too obnoxious or too large and would ordinarily be thrown to the side. 
Using SU! Almost Amethyst as the base, I added a large/bold print from the Samantha Collection - Lilac, a product of crate paper.  the accented dark purple pattern paper is from the Katlin Collection - Daydream and the lighter green pattern is from the Mia Collection } Stack...both also made by crate paper.  The sentiment is from Hero Arts...which I found at Target - another encouraged purchase.  I always seem blind to the need for more sentiments until I participate in a class or see a card in a gallery that I like and notice the cute sentiment.

Thanks for looking!!  Comments are always welcome!


Playing A Little Pattern Play Catch Up!!


Today I am playing a little catch up from the most recent online class that I've participated in through OnLineCardClasses.com.  This was a FANTASTIC class that I would recommend to everyone!!  Kristina Werner and Jennifer McGuire did an excellent job, not only with the tutorials and videos that they did themselves but also lining up the guest instructors as well.

On Day 1 we learned some basic tips on how to pick papers with certain attributes, i.e. which sized designs work best with each other.


This an attempt to look forward to the warmer weather to come...rather than dwell on the cold weather that seems to continue to hold the area in which I reside...you know what they say about Iowa - you don't like the weather just wait 5 minutes. :)  The base for this card is summer sun yellow from Stampin' Up! as well as the ribbon.  The Summer stamp is from the Season Set, also Stampin' Up! and the designer paper is from the 6X6 paper pack Neopolitan made by American Crafts. 

The draw back to enjoying this class is that I have been encouraged to purchase as many 6X6 packs as I can get my hands on...just to make sure that I have everything at my finger tips as necessary.

Thanks for looking...comments are always welcome!!


Tuesday, July 17, 2012

Challenge Accepted!!

I put myself to the task and it turned out wonderful!!  Again, I took my last challenge seriously and found that it wasn't as hard as it seemed.  I made a card that had no specific purpose...you know what I figured out?!  The card, all of a sudden, has a purpose now.

  This card was made using the Tim Holtz Distress Inks.  (I think I have fallen in love with this technique because of its Bohemian charm!!)  Please go to YouTube and take advantage of the free Tim Holtz tutorials that he offers. They are very educational and inspiring!!  I actually used the alcohol re-inkers to dye the flowers - which turned out wonderfully!!  They are nice and vibrant!!  I also used the Stampers Anonymous 490 set for the saying on this one...it fit well with this card and the challenge. 

I mounted my tag to a piece of Early Espresso, from Stampin' Up!, and made a home-made envelope for it as well.  Don't worry if you've never made an envelope and would like to try it for yourself...this was the first envelope I've made - EVER!! I turned out pretty nicely.

For the envelope, I simply cut a piece of 12 X 12 paper down to twice the size of the card and fold over the sides and tape them down.  I cut a little off the ends to form flaps and tape them down too!  Very easy.

I have one of those people in my life that I think is pretty spectacular and have not quite figured out how to tell her...what better way than to send them a card that is hand made?

Thursday, June 21, 2012

Do We Really Need A Reason?

Today I am posting a card that I made for my Grandpa for his 94th Birthday!! Ninety-four is a lot to celebrate!


 For this card, I used several Stampin' Up!, & Basic Grey products.  I used distress inks to let the image pop and love the effect it gave to the card!!

Its not shown well, but the butterfly image is stamped on vellum to give a soft window... this allows the word image to be seen in the front of the card. 

As shown in the next window, word stamps are very elegant if they are placed well.

Grandpa was sleeping when I set it on his table, but knowing him I know he very much enjoyed having received this card.  He is a very down to earth person who appreciates the time and energy it takes to give and received such a thoughtful gift as a homemade card.


My question today is Do we really need a reason to make a card?  Do you?

I know that I have always had a reason to make a card whether its intended to give right away or if its something premade to send for such an occassion later...my challenge is to push myself to make a card for no reason...I am working on such a card right now and I will say it has been difficult to put together...I will share this card when its finished!!  Will you be able to make a card for no other reason than to put one out there and have til you need it - for whatever reason?  Should we have a cache for such things?  I'm interested in your thoughts, so let me know what you think!!

As always, any and all comments are welcome!

Thanks for looking and happy stamping!!

Stay Inspired!

Roseanne

supplies:
Cardstock:  SU! Brocade blue, Regal Rose, Whisper white
Designer paper:  euphoria paper pad from BasicGrey
Ribbon:  Stampin' Up!
accessories:  vellum
ink: stazon Jet Black, Memento Tuxedo Black, Archivers coffee, Stamp-a-ma-jig, SU!
Techniques:  distress

Sunday, April 29, 2012

Magazine Inspiration Make-Over!!

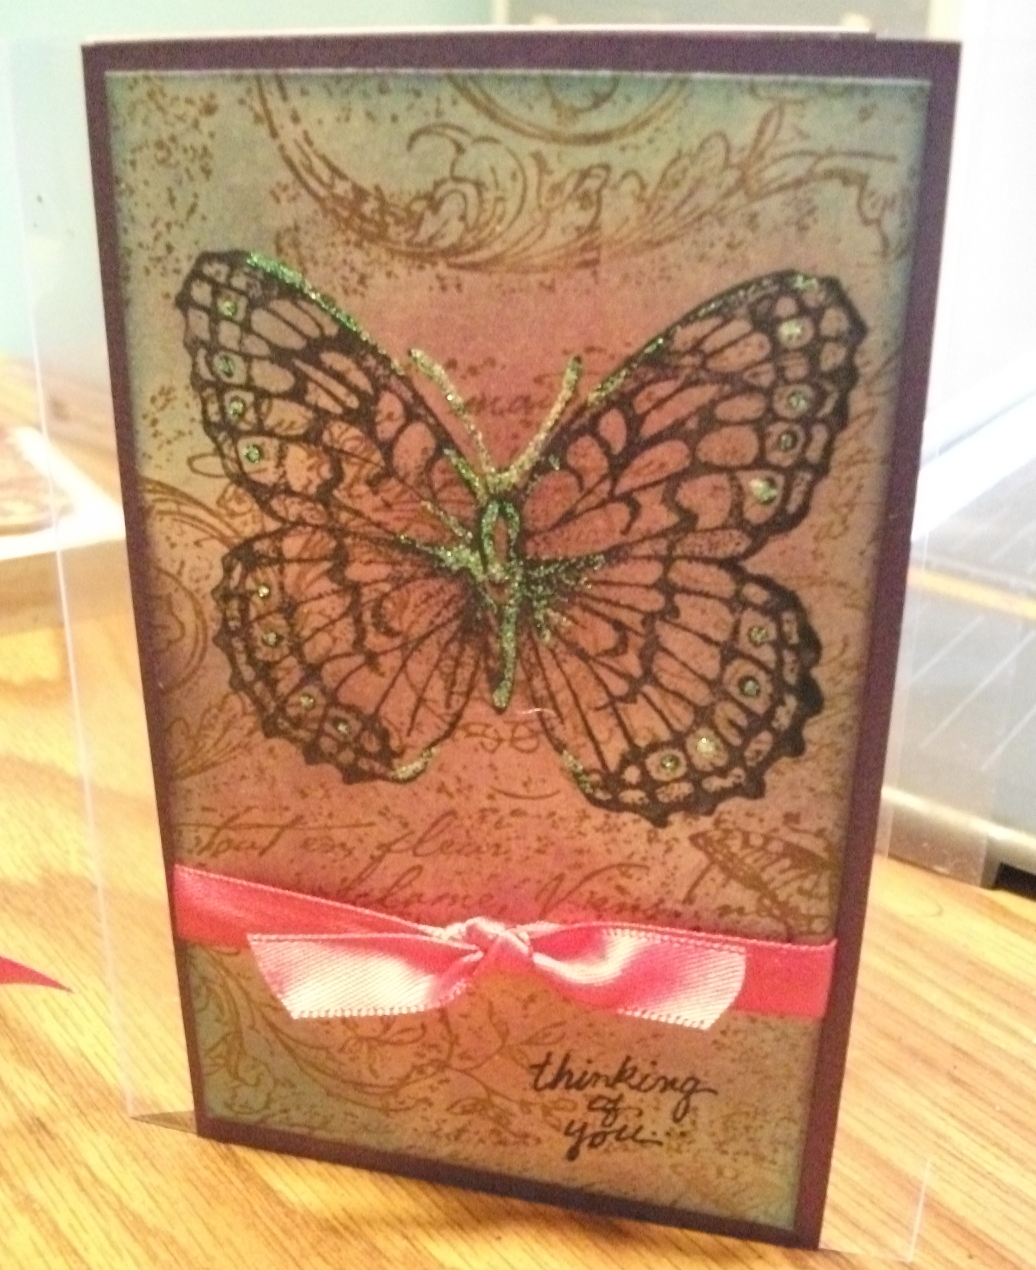
I picked up the most recent issue of CardMaker, featuring a front cover photo and article by Tim Holtz. I was taken by the beautiful technique of the card on th front - typical beauty created by Tim Holtz!! His card inspired me to pull out my Distress Inks from Ranger and create, what I originally thought of as a beautiful card.


The distress technique, learned from Wendy Veach from Stampers Anonymous 490, was nice with the additional pop of the color from the ribbon, but from second glance, it appears to be too plain.

I know I have this problem all the time, which is why I don't post as much as I like - and knowing that I am my own worst critic, I couldn't bring myself to post this card until I improve the color, or background, or the over all appearance of the card.

Happy to say I did just that!!  After taking a second look at the card - which I had intended to send my mother for mother's day, I KNEW I could do better!

So my second card was that much better!

I used the same elements on this card...just enhanced its appearance with more color, gave a pop to the background and accentuated the color better!!

The second card is attached to acetate, because I couldn't decide what to put it on AND I didn't want to take away from the stamped background of the the card.

Happily I will send this card to MOM for mother's day - and although she'll say "you didn't have to do that," I know she will be proud to have received such a well thought out card!!

I hope everyone's been thinking of the card they want to send their MOM for Mother's Day, and I hope all of your cards are as well received as they want them to be!

Stay inspired and keep creating!

Roseanne

supplies:
Stamps:  Stampin' Up Stampin' Around Jumbo Wheel Very Vintage, SU! Stipple Butterfly, Stampendous Thinking of You...
Paper:  the PaperCut Violette Curious Metallic, Art Gone Wild Acetate Sheets
Ink:  Memento Tuxedo Black, Archival Ink Coffee, Tim Holtz Ranger Distress Ink dusty concord, worn lipstick, broken china
Accessories:  Generic Hot pink ribbon, Crystal Stickles


Thursday, April 19, 2012

As promised!

As promised, the third of 3 scrapbook layouts!

Scrapbooking with a purpose is essential in getting the job done!  I am glad I bought these three frames...if for no other reason than to keep me going!!

This layout features the t-ball talents of my oldest.  It, of course features his natural swinging ability and base running.  Whether they are pros or still learning, nothing brings a bigger smile to a childs face than a layout that features him or her doing something they're proud of!!

This layout was extremely simple.  I used a paper pack from Close to My Heart - this gave me the ability to have ready matched paper.  I made the base balls by punching circles and adding the faux stitching with marker.  I distressed the balls and the title to age the look a little and to help pop-up the balls...which were adhered with foam tape.  Just a small touch of journaling and an 'All Star' rub on and done!! 

This layout shows how simple photos and embellishments go a long way!!

Thanks for looking!

stay inspired!

Roseanne


Monday, April 16, 2012

To continue with my previous post...and to include all three kids in the fun, I have finished the second of 3 framed scrapbook pages!  This page is especially adorable because it truely captures the fun & sillyness of my middle child.

On this layout, I incorporate a pull tab for journaling.  I like to do this every once in a while because I think that journaling can sometimes detract from the intended focus of the page...in this case the focus is on his adorable little face.


I started with a solid blue background, added 11 X 12 stripe accent, then the polka dots, stars and more stripes - all designer papers are from Bo-Bunny Shabby Princess Collection, with solid red tucked in here & there.  I outlined his name and age with a frame cut using a Quickkutz folder from long ago...I had that sitting in a box- I couldn't throw it away. The buttons -generic, and star clip- making memories, cheeky flat clips, made nice accents to the page and the "so fun" was cut from white card stock, using my cricut and distressed with denim ink from Close to My Heart.  The tag for the journaling card (tucked under the picture) was punched using Stampin' Up! punches.

It seems as though a lot of time and energy went into this page, but actually, it wasn't that difficult - especially considering the subject! :)

I will post the third and final layout soon!  I hope this helps to get you motivated to pull out those pics and get them started.  I felt that this was my way of at least getting to scrap current photos - even though I am notoriously behind on my scrapbooking!

Thanks for looking!!

stay inspired!

Roseanne